Introduction
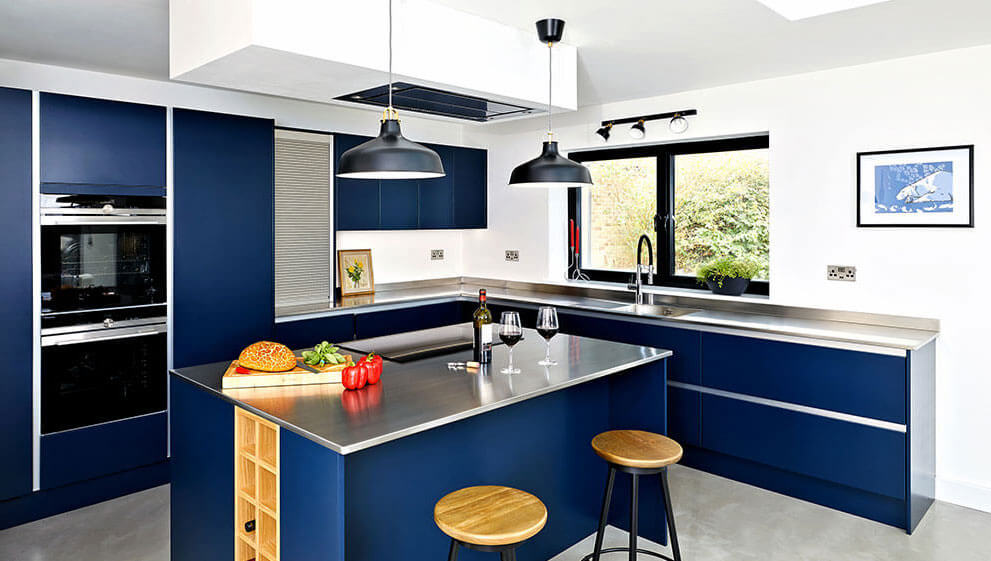
Increasingly at DSM are supplying our stainless steel kitchen worktops in domestic spaces where their neutral aesthetic lends themselves to a variety of styles and design objectives; looking sleek and contemporary in a modern loft apartment, or solid and timeless in a traditional farmhouse.
Stainless steel has a chameleon-like quality that allows it to bring out the best of any kitchen design and blend seamlessly with the adjacent materials – it looks as good next to natural wooden base units, as it does against gloss painted ones. Stainless steel is the most durable and easy to look after countertop material currently available, requiring very little ongoing maintenance. It's tough enough to take the regular knocks and bumps of a bustling commercial or home kitchen, and the only material capable of taking hot pans directly from the oven – it will not crack, warp or discolour from doing so. Because of these qualities, stainless steel will outlast all other worktop materials, and can literally give a lifetime's service. There is a reason why professional kitchens only use steel worktops!
A number of our customers are professional installers themselves, but many are also new to stainless steel worktops, or keen DIYer’s looking to make the most of their renovation budget by performing the installation themselves. We, therefore, decided to put this step-by-step guide together to assist the uninitiated, and hopefully even provide some useful tips to the experienced.
We will look firstly at the initial measurement stage and provide some guidance on taking accurate dimensions and preparing a basic drawing. We’ll then move on to looking at the process for installing stainless worktops, before wrapping up with our recommendations for ongoing maintenance and care for them to ensure they stay looking their best for a lifetime's use.
Stainless worktops are incredibly easy to install providing a few basic steps are taken, with no cutting or adjustment required on-site as might be the case with many other worktop materials. All of our stainless steel worktops are bespoke and completely made to order, so providing the initial dimensions taken prior to manufacture are correct, the finished work surfaces should slot snugly into place.
There are a few key points to be aware of before you attempt to install your stainless steel worktops:
To view more details on our worktop range, check out the dedicated product page
Measurement
When you come to DSM to discuss your project and provide a quote for stainless steel worktops, you will need to provide us with some basic approximate dimensions to allow us to quote against. This is best provided in the form of a drawing to ensure everyone is clear on the overall design.
Once the order is placed, we will require accurate dimensions, including overall dimensions for each worktop, sizes of any cut-outs, and positions of any integral bowls, drainers and hob cut-outs etc.
Again, this most easily achieved on a plan view ‘layout’ drawing clearly showing all the necessary dimensions. Whilst this might sound daunting, it is actually relatively straightforward, as long as you follow some simple rules:
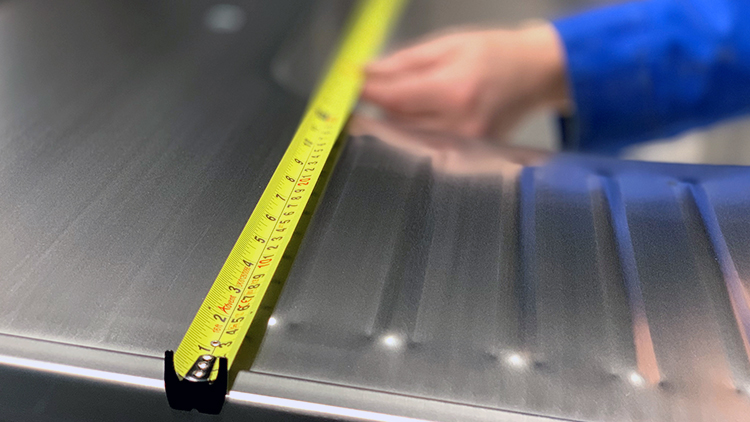
- Where the worktops will back onto a wall, take the dimensions along the wall edge. This can be done with a standard good quality tape measure, but we would recommend a good quality laser measure. If using a tape measure, ensure the tape is taut at all times when recording the dimension – you may need assistance from someone else to hold the opposite end of the tape measure to achieve this.
- Where worktops run into a corner if you are concerned the corner is not relatively square, use an angle measure to obtain the angle of the corner. This is generally not necessary in the vast majority of cases.
- Where a wall is significantly running in and out along its length, such as in old cottages, please give us a call to discuss – we have a number of options to overcome these situations.
- Only take dimensions when the room surfaces are finished, and all the final wall coverings (such as plaster and tiles etc) have been added. This will ensure the worktops are not too large for the finished room.
- Never take dimensions at floor level, always at the actual height the worktops will be installed at, particularly when being installed against a wall - you will be surprised by how a wall can vary at different heights.
- Double (if necessary, triple) check your measurements, or get a friend or colleague to check for you - remember it's better to measure twice and cut once, rather than the other way around – stainless steel worktops can rarely be adjusted once made if the initial sizes are found to be incorrect!
- Always allow a small tolerance on your measured dimensions when adding them to your drawing, where worktops are to be installed between walls or other items such as cupboards – we recommend around 3mm when a worktop is between walls – this will ensure the worktop will fit in the space available, and any remaining gaps can be filled with metallic finish silicone sealant.
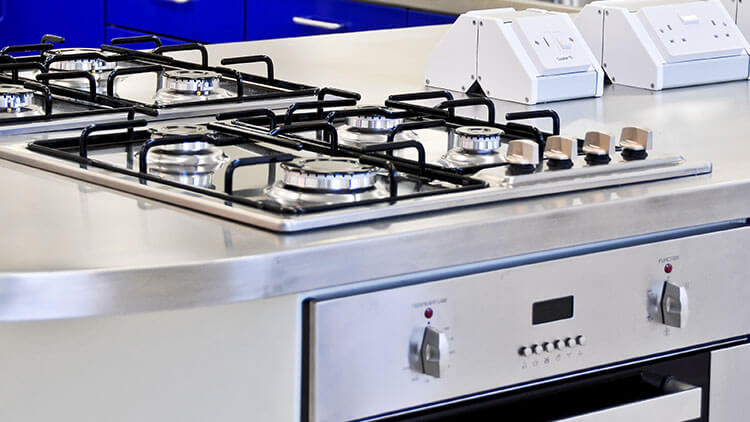
- Where integral bowls or hob cut-outs are required, add these onto the drawings and indicate their preferred positions relative to a) the front edge and b) the edge to either the left, or right, hand end. This dimension can either be to the centreline of the bowl, or to one of its vertical faces. For hob cut-outs, also include the dimensions for the required size of the cut-out. This can usually be found in the manufacturer’s instructions or installation manual.
- Once you have added all the dimensions to the drawing, e-mail it over to your contact at DSM, and we will take it from there. If you have drawn the sketch by hand, then you can always photograph it using a smartphone in order to e-mail it to us. If there are any questions arising from the drawing, we will check those with you at that point.

Delivery
Once the worktops are complete, we will arrange delivery to you. If there are a small number of worktops this might be on a next day pallet service. If the worktops are particularly large, or there are a number of them on the project, delivery will more likely be on a dedicated A to B delivery van.
Either way, you will need to provide assistance at the delivery location, in unloading the worktops and getting them to the installation area. When doing this there are a couple of key points to bear in mind:
Weight
Stainless steel worktops are usually bonded to a moisture resistant MDF sub-frame on the underside, in order to strengthen the worktop further whilst also providing a substrate to screw into during installation.
This results in the finished tops often being very heavy - for example, a simple 2000mm x 600mm worktop can weigh upwards of 40kg. If the worktop is longer, contains bowls, and has a second additional layer of MR MDF, this weight can start heading towards 100kg.
Precautions, therefore, need to be taken to ensure the tops can be unloaded, unwrapped, carried and lifted into place safely without causing injury. Many hands make light work, so ensure there are enough people available to help lift the worktops into position and ensure that proper manual handling procedures are used.

Bending on long/thin profile worktops
Whilst stainless steel is a very strong material, it can flex and bend. On very long worktops, particularly those with very thin edge profiles, precautions should be taken to prevent the worktop from bending in the middle, or around any potentially weaker areas such as around hob-cut-outs.
If the top is allowed to bend too far it can result in a permanent crease or dimple in the work surface which cannot be removed, so it is worth taking extra care with longer and thinner stainless worktops.
In such cases, we recommend carrying the worktop sideways – so that its surface is vertical – and having someone support the central, or weaker sections (for example around a hob cut-out) whilst it is lifted into place.
Basic Installation
As we have said, if the above precautions are taken into account, stainless steel worktops are very easy to install and can be installed to a professional finish in a short space of time. Whilst not exhaustive, this basic procedure can be followed in the majority of cases:
- Position and unwrap - move the wrapped worktop into position, the correct way around, in front of the base units the worktop is to be mounted on and then remove all of the outer wrappings.
- Packing Measurement - if the worktop is completely filled with MDF to its full thickness (this will only apply if you have specifically ordered this or if the worktop has a thinner edge profile – e.g. 20mm), then this step can be skipped. More commonly, however, the worktop will have a single layer of MDF to its underside resulting in a cavity to the underside of the worktop (e.g. if the worktop front edge is 40mm, only 20mm of that may be filled on the inside). This is intentional, as it allows greater flexibility to set the height of the worktop and determine the extent to which the front edge profile overlaps the cupboard units or framework below. For example, if the worktop front edge is 40mm, and only 20mm of that is filled with an MDF sub-frame, the worktop will overhang the base units by around 20mm. If you only want this to be 5mm, you need to add 15mm of packing material at the points you intend to screw the worktops to the base units.
- Packing - Once you have determined the approximate thickness of the packing required, this can be added to the top of the base units at the intended fixing points and secured in place. Any sheet material can be used for packing, but wood is most commonly used.
- Mounting - Carefully lift the worktop into position onto the base units, taking into account the precautions mentioned previously.
- Levelling - Check with a spirit level that the worktop is level (place the level carefully to avoid scratching). If the worktop requires additional packing to level it, or to raise it further, this can be inserted at the fixing points.
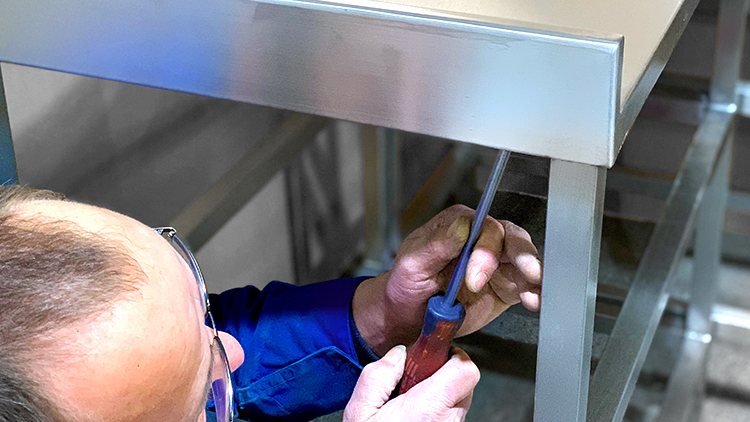
- Fixing - once the worktop is level, and you are happy that it is correctly positioned, simply screw up through the fixing points into the worktop sub-frame. Ensure that you use screws of the correct length as using overlength screws may result in them pushing through the MDF sub-frame and hitting the stainless steel which can push the steel up and dent it from the underside which will be visible from the top.
- Seal joints - seal any joints to walls or adjacent work surfaces with silicone sealant to make them watertight. For aesthetic reasons, it is best to utilise a metal finish sealant, rather than clear or white, and this will render the join much less visible.
- Clean down - Once the silicone has set, simply wash the stainless steel with warm, mild soapy water, rinse and dry with a clean cloth. Remember to cover the surface to protect the polished stainless steel worktop finish, if further works in the area are still to be completed.
As you can see, these installation steps are very straight forward, and the average stainless countertop can be installed in around half an hour.
Scratches
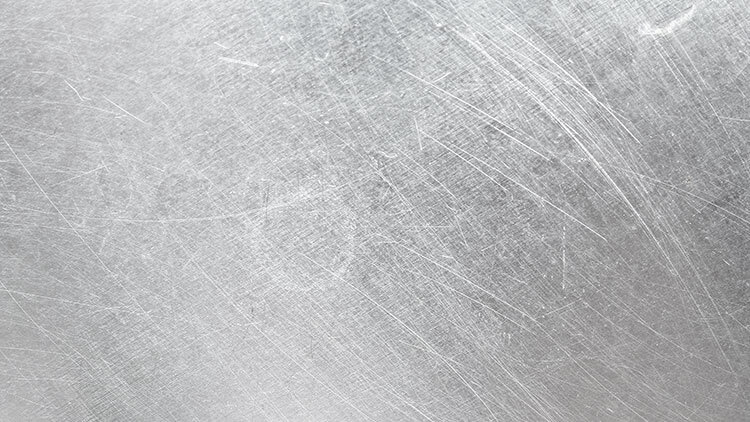
Stainless steel is a very strong and robust material, but it will scratch over time, and the factory polished finish will gradually change into a natural and attractive patina. However, scratches should be avoided during installation, particularly where the site has to be handed over to a client or end-user. Scratches will occur if sharp or metal objects are dragged across it, so never place tools on the work surfaces unless they are covered with dust sheets or cardboard etc.
Scratches can't be polished out on site, and normally require the worktop to be returned to the factory for re-polishing. This can be costly, so it is a better option to take the necessary precautions and protect the surfaces during the installation of the complete kitchen.
Maintenance
As with the installation, the ongoing care and maintenance of stainless steel worktops are extremely simple, and if followed correctly and performed regularly, will ensure your new worktops look good and last for a lifetime.
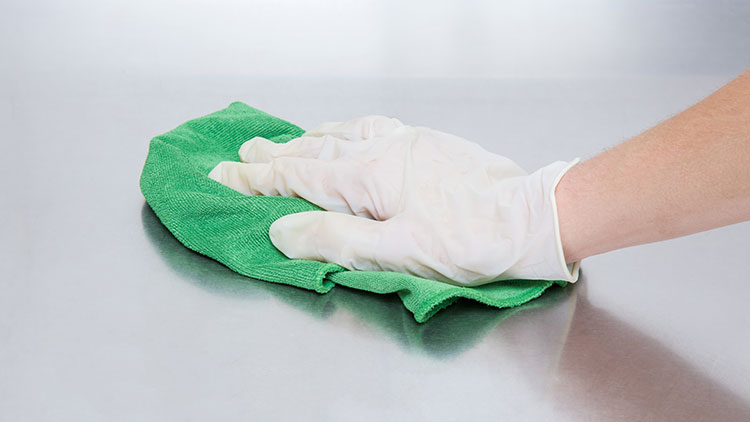
Strong chemicals are unnecessary, and abrasive cleaning compounds should be actively avoided as they can damage the polished finish. All that is required is clean, warm mild soapy water to wash the worktops down, followed by a rinse with clean water, before drying with a soft cloth.
Stainless steel has natural anti-bacterial qualities that resist the growth of bacteria and germs much more than other worktop materials, so even cleaning with anti-bacterial solutions is often unnecessary.
For more information on cleaning stainless steel, see our Stainless Steel Product Care Brochure
If you're interested in a new kitchen worktop, take a look at our kitchen worktops page for more information.
You can give us a call on 01159 255927 whenever you'd like to ask questions, get advice and even ask for a free, no-obligation quote!
Our Guides & Brochures

DSM Stainless Steel Product Care
Please take a moment to read our product care brochure to help you look after you new stainless steel units to ensure they look as good as the day they are installed.
Download DSM 25 Year Warranty
For more information on our 25 year warranty please download our brochure
Download
DSM Terms of Business
Our Terms of Business Agreement sets out the terms and conditions on which we agree to provide services for you
Download